A single well-designed presentation can reach over 365,000 views and get embedded 275,000 times across blog posts. Guy Kawasaki’s Canva presentations proved this, showing how great design can increase your message’s reach.
Creating meaningful presentations doesn’t require artistic talent. Canva’s thousands of templates and accessible editor help both seasoned professionals and beginners design stunning presentations without any design experience.
Success comes from proven presentation principles. The 20/30 rule suggests using no more than 20 slides with fonts sized 30 points or larger. Most experts recommend seven to ten key slides to maximize impact.
Want to create professional-looking presentations that capture attention and deliver your message? Let’s explore the essentials of crafting impressive Canva presentations – from template selection to those finishing touches that make your slides stand out.
Setting Up Your Canva Workspace
Canva’s presentation workspace helps you unlock amazing design possibilities, even if you’re just starting out. You can access over 250,000 templates with the free plan and 610,000 with Canva Pro. This makes creating professional presentations a breeze.
Creating Your First Presentation
You’ll need a quick setup to start using Canva’s presentation features. Here’s what you need to do:
- Sign in to your Canva account
- Click the “Create a design” button in the top right corner
- Select “Presentation (16:9)” from the options
- Choose from available templates or start with a blank canvas
- Begin customizing your design
The Magic Design feature makes this process even easier by creating up to 10 starter slides from your text prompt. This smart tool builds your story’s foundation that you can customize to match your style.
Understanding the Basic Tools
Canva’s editor has an easy-to-use interface that helps you discover design tools quickly. Your workspace’s left side shows the essential elements panel that has:
Text Tools: You’ll find different text styles, including headings, subheadings, and body text. You can edit any text element with a double-click or drag new text boxes onto your slides.
Elements Panel: This section gives you icons, shapes, tables, photos, and charts. You can also customize the side panel by clicking “MORE” at the base to add content you use often.
Upload Section: You can store and manage your photos, illustrations, and videos here. Just drag these elements into your design for smooth integration.
Your work saves automatically as you design. You can create specific folders for your projects and share your designs or entire folders with your team.
Building Your First Slide
A captivating first slide builds the foundation for a soaring win in presentations. Your presentation’s calling card is the title slide that shapes how your audience sees your entire message.
Title Slide Design
The overall theme should shine through your title slide without sacrificing visual clarity. center-aligned titles create a strong focal point, and right-aligned titles pair well with background images that have clear copy space. You can make your title pop by mixing thick and thin fonts. Letter spacing helps you arrange perfect alignment between title and subtitle text.
Content Layout Options
Your slide arrangement has a substantial impact on how well you connect with the audience. These proven layout techniques will keep viewers interested:
- Alternate between horizontal and vertical layouts
- Mix single-image slides with multiple-image compositions
- Vary text placement and image positioning
- Balance white space with content elements
This variety helps you keep your audience focused while your key messages remain clear and effective.
Adding Visual Elements
We used visual elements to communicate complex ideas better than text alone. Your images and graphics should connect directly to your message. High resolution maintains professionalism. The elements tab in Canva gives you shapes, graphics, photos, videos, and audio samples that will improve your presentation’s visual appeal.
Text Formatting Tips
Your presentation’s readability depends on text formatting. A quick double-click on any text box reveals formatting options for font size, style, and spacing. Professional slides need consistent alignment – left-aligned text reads best.
Canva offers these effects to make your text stand out:
- Curve effects for creative emphasis
- Shadow options for depth
- Background highlights for contrast
- Outline styles for definition
Line spacing between text elements should be adequate. Larger fonts for headlines create clear visual hierarchy. This approach keeps your presentation professional and easy for your audience to follow.
Creating a Consistent Design Theme
Professional presentations rely on visual harmony as their life-blood. Your audience stays focused on your message when you use a consistent design theme that eliminates distracting mismatched elements.
Brand Colors and Fonts
A cohesive color scheme starts with two complementary key colors. You can expand this palette by adding deeper or softer shades of your chosen colors. This method adds visual interest while keeping your presentation professional.
Your color choices shape how audiences notice your message. Different colors create specific effects:
- Blue: Conveys trust and reliability
- Yellow: Evokes happiness and positivity
- Green: Symbolizes growth and sustainability
Canva Pro’s Brand Kit feature lets you store up to 100 color palettes, and each palette can hold 100 colors. The Brand Kit saves your color choices for future designs, so you won’t need to guess which shade you used before.
Typography is just as vital for design consistency. You’ll get the best results by picking two typefaces and using them throughout your presentation. Your heading font should be the largest and most expressive to match your brand’s personality. Body text and subtitles need to prioritize readability over decoration.
Canva streamlines your design process by letting you set default fonts for:
- Headings
- Subheadings
- Body text
Without doubt, simple designs create professional-looking presentations. The classic advice “Keep it simple, sweetie” (KISS) rings true, especially when you have many elements to work with. More elements don’t always boost your design – they might create visual clutter that pulls focus from your message.
Teams working together on presentations benefit from Canva’s brand controls for consistent designs. Administrators can limit access to specific brand colors and fonts, which helps maintain visual cohesion even with multiple contributors.
Note that spreading your colors thoughtfully across your presentation works better than using all colors on one slide. This approach adds depth and visual interest while keeping things professional.
For visuals, try dual-tone color overlays, especially with unexpected color combinations, to create engaging slides that match your brand identity.

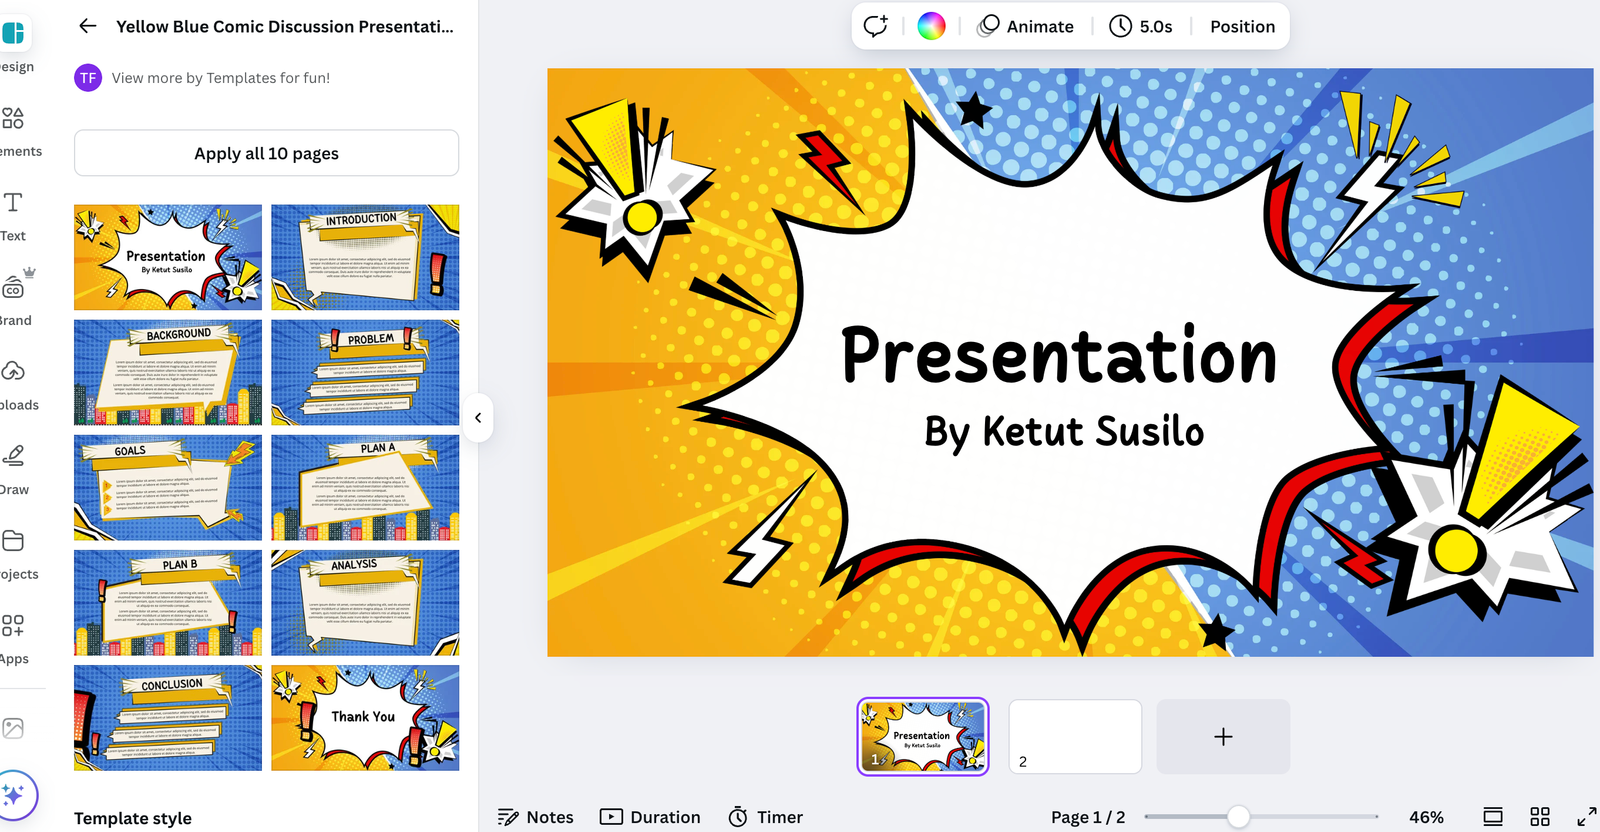
Adding Professional Touch with Templates
Canva’s vast template library helps you create professional presentations. The platform offers over 12,000 templates, making design customization easier than ever.
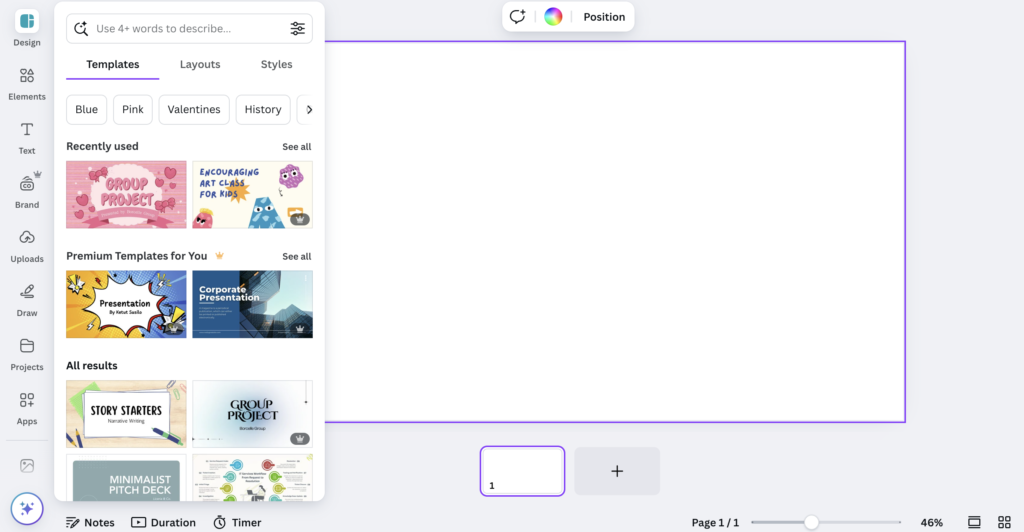
Finding the Right Template
Your search starts on Canva’s homepage. The search bar lets you quickly find “presentations” to browse through numerous designs. You can filter templates by:
- Industry-specific designs (business, education, marketing)
- Color schemes and visual styles
- Layout choices (minimal, modern, creative)
- Professional or casual themes
The template selection process lets you preview designs by hovering over options and clicking the preview icon. This feature shows you the complete template set before you choose a design.
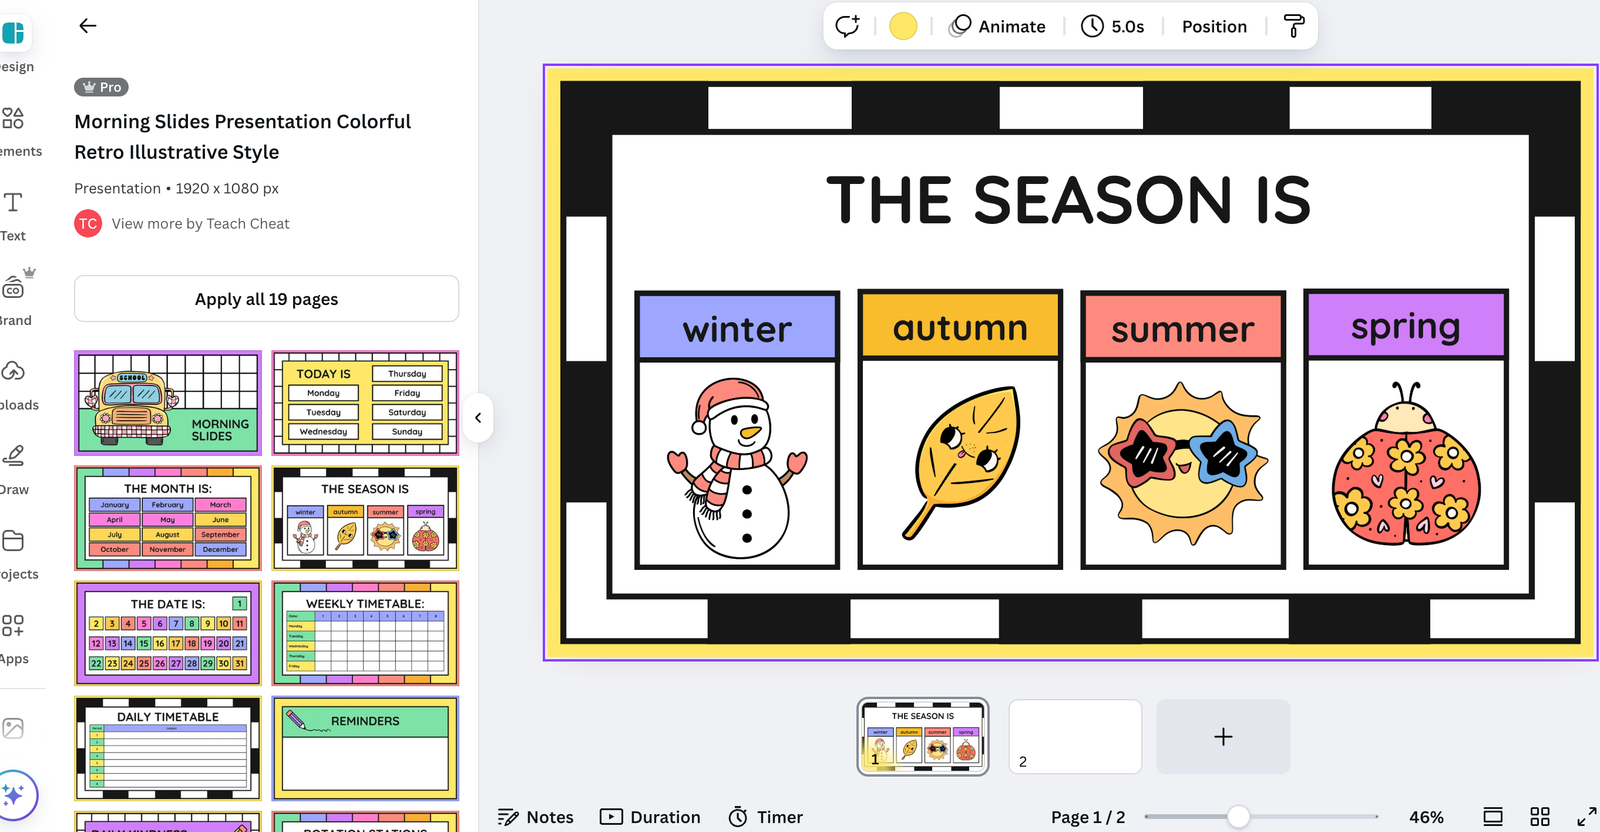
Customizing Templates Effectively
Template customization is where creativity flourishes. Your presentation will stand out when you personalize the templates that form the foundations of your design. The accessible interface makes editing simple.
These steps will help transform a template into your unique creation:
- Modify color schemes to match your brand identity
- Adjust fonts and typography to read better
- Replace stock photos with your own images
- Add charts and graphs to visualize data
- Incorporate animations and transitions for dynamic effects
Canva provides advanced features beyond simple customization. A straightforward drag-and-drop interface lets you upload files and photos. The platform includes dynamic elements like slide transitions and text animations to boost audience engagement.
Teams can share feedback through Canva Live in real time. The Magic Shortcuts feature adds eye-catching effects that grab attention. You can download your finished presentation in various formats, including PDF and PowerPoint (PPT).
The accessible editor makes customization simple, whatever your design experience. Templates maintain consistency across slides while giving room for creative expression. Your specific needs shape these adaptable templates, and each presentation reflects your unique style and message.
Finalizing and Sharing Your Presentation
The final step to deliver a professional message is polishing your presentation. Canva gives you several ways to preview, present, and share your work after you perfect your design.
Preview and Polish
You can catch potential issues by previewing your presentation before sharing it. Live edits show up right away in your presentation while you preview. This helps you make last-minute changes without breaking your presentation flow.
The Draw tool works in both full-screen and presenter views. You can highlight important points during live presentations with this tool. These markups stay temporary and vanish once you exit presentation mode.
Export Options
Canva lets you export your presentations in different formats based on your needs. Here are the main download options:
- PDF format for handouts and printing
- PowerPoint (PPT) for traditional presentation software
- MP4 video for recorded presentations
- GIF format for animated slides
Canva Pro users can create videos up to 2 hours long, while free users get 30 minutes. Your presentation will appear in your device’s download folder right after you save it.
Presentation Mode Features
The platform comes with four different presentation modes that serve unique purposes:
Standard Mode: You can control slides with keyboard arrows or on-screen controls. This works best when you want to control the pace of your content delivery.
Presenter View: Two windows open at once – one for your audience and one for you. Your window shows notes and upcoming slides so you can navigate smoothly. The Edit button we added recently stops accidental changes during presentations.
Autoplay Mode: You can set specific time intervals between slides for self-running presentations. This is a great way to get content for lobby displays or unmanned presentations.
Present and Record: You can capture your presentation with voice narration to share later. Remote audiences can watch it at their convenience.
Remote Control lets multiple presenters manage slides live from different devices. This keeps screen sharing separate from slide navigation and spreads control among team members.
Canva Live adds interaction to collaborative presentations by letting audiences ask questions during the show. Magic Shortcuts™ also let you trigger animations with keyboard commands to grab attention.
You have several options to share your presentation:
- Public View Link: Anyone can view without logging in
- Template Link: Others can use your design as a template
- Collaboration Link: Specific people can edit the presentation
The platform supports offline presenting through local playback. Your presentation will run smoothly whatever your internet connection is like.
Conclusion
You don’t need design expertise or technical knowledge to create stunning presentations with Canva. The platform offers thousands of templates, easy-to-use editing tools, and professional features. These elements help you craft engaging presentations that grab your audience’s attention.
Great presentations strike a balance between visual appeal and clear messaging. Your content should follow consistent brand colors and clean layouts. Professional templates are the foundations of impactful presentations that deliver your message well.
Canva’s versatile sharing and presentation options help your content reach its target audience. You can share through live sessions, recorded videos, or downloadable files. As you practice with these tools more, you’ll develop your unique presentation style while meeting professional standards.
Take small steps and try different features. Your presentation skills will improve with time. A professional-quality presentation is just a few clicks away.
If you want to find out more about boosting audience engagement in academic presentations for ESL speakers, check out this Engaging Academic Presentations for ESL Speakers.
FAQs
Q1. How can I make my Canva presentations more visually appealing?
To enhance visual appeal, use consistent color schemes and fonts, incorporate high-quality images and graphics, and utilize Canva’s design elements like icons, shapes, and charts. Balance your slides with white space and avoid cluttering them with too much text.
Q2. What’s the best way to start creating a presentation in Canva?
Begin by selecting a suitable template from Canva’s extensive library. Then, customize it by modifying colors, fonts, and layouts to match your brand or message. You can also start with a blank canvas and build your presentation from scratch using Canva’s intuitive drag-and-drop tools.
Q3. How can I ensure consistency across my Canva presentation?
Maintain consistency by using a cohesive color palette and limiting yourself to two or three fonts throughout your presentation. Utilize Canva’s Brand Kit feature to store your brand colors and fonts for easy access. Apply the same design elements and layout styles across all slides to create a unified look.
Q4. What are some tips for effective text formatting in Canva presentations?
Keep text concise and use bullet points for clarity. Ensure readability by using larger fonts for headlines and maintaining adequate line spacing. Experiment with Canva’s text effects like curve, shadow, and outline to add emphasis where needed, but use them sparingly to maintain a professional look.
Q5. How can I make my Canva presentation more engaging for the audience?
Incorporate interactive elements like videos, animations, and hyperlinks to keep your audience engaged. Use the 20/30 rule: aim for no more than 20 slides and keep your presentation under 30 minutes. Utilize Canva’s presenter view and live presentation features to interact with your audience in real-time.


![12 Basic Grammar Rules to Write Like a Pro [2025 Guide]](https://englishlearninghub.online/wp-content/uploads/2025/07/12-Basic-Grammar-Rules-to-Write-Like-a-Pro-2025-Guide-1024x576.png)